





Summary
A complete overview of the Zoom integration process, including authorization, configuration, and managing connected accounts with the KnowledgeCity LMS.
Introduction
The Zoom integration with KnowledgeCity LMS allows administrators to connect their Zoom Business account directly to the learning platform. This enables seamless creation of Zoom meetings, management of registrants, and import of participant data. Once integrated, a dedicated Zoom option becomes available when setting up online class events, allowing sessions to be created automatically without manual intervention and ensuring synchronization of participant and meeting data between both platforms. For detailed instructions, refer to our How to Schedule and Manage an Online Class Event.
Requirements
- KnowledgeCity LMS administrator with Full Access, or a custom role that grants the Integrations section: Required to access the LMS Integrations settings.
- Zoom Business Account Admin: Required to grant permissions and connect the Zoom business account successfully.
Steps to Follow
Follow the step-by-step instructions below to integrate your Zoom account to your KnowledgeCity LMS.
Step 1. Access the Integration Platforms
- Sign in to your KnowledgeCity LMS with an administrator account that has Full Access.
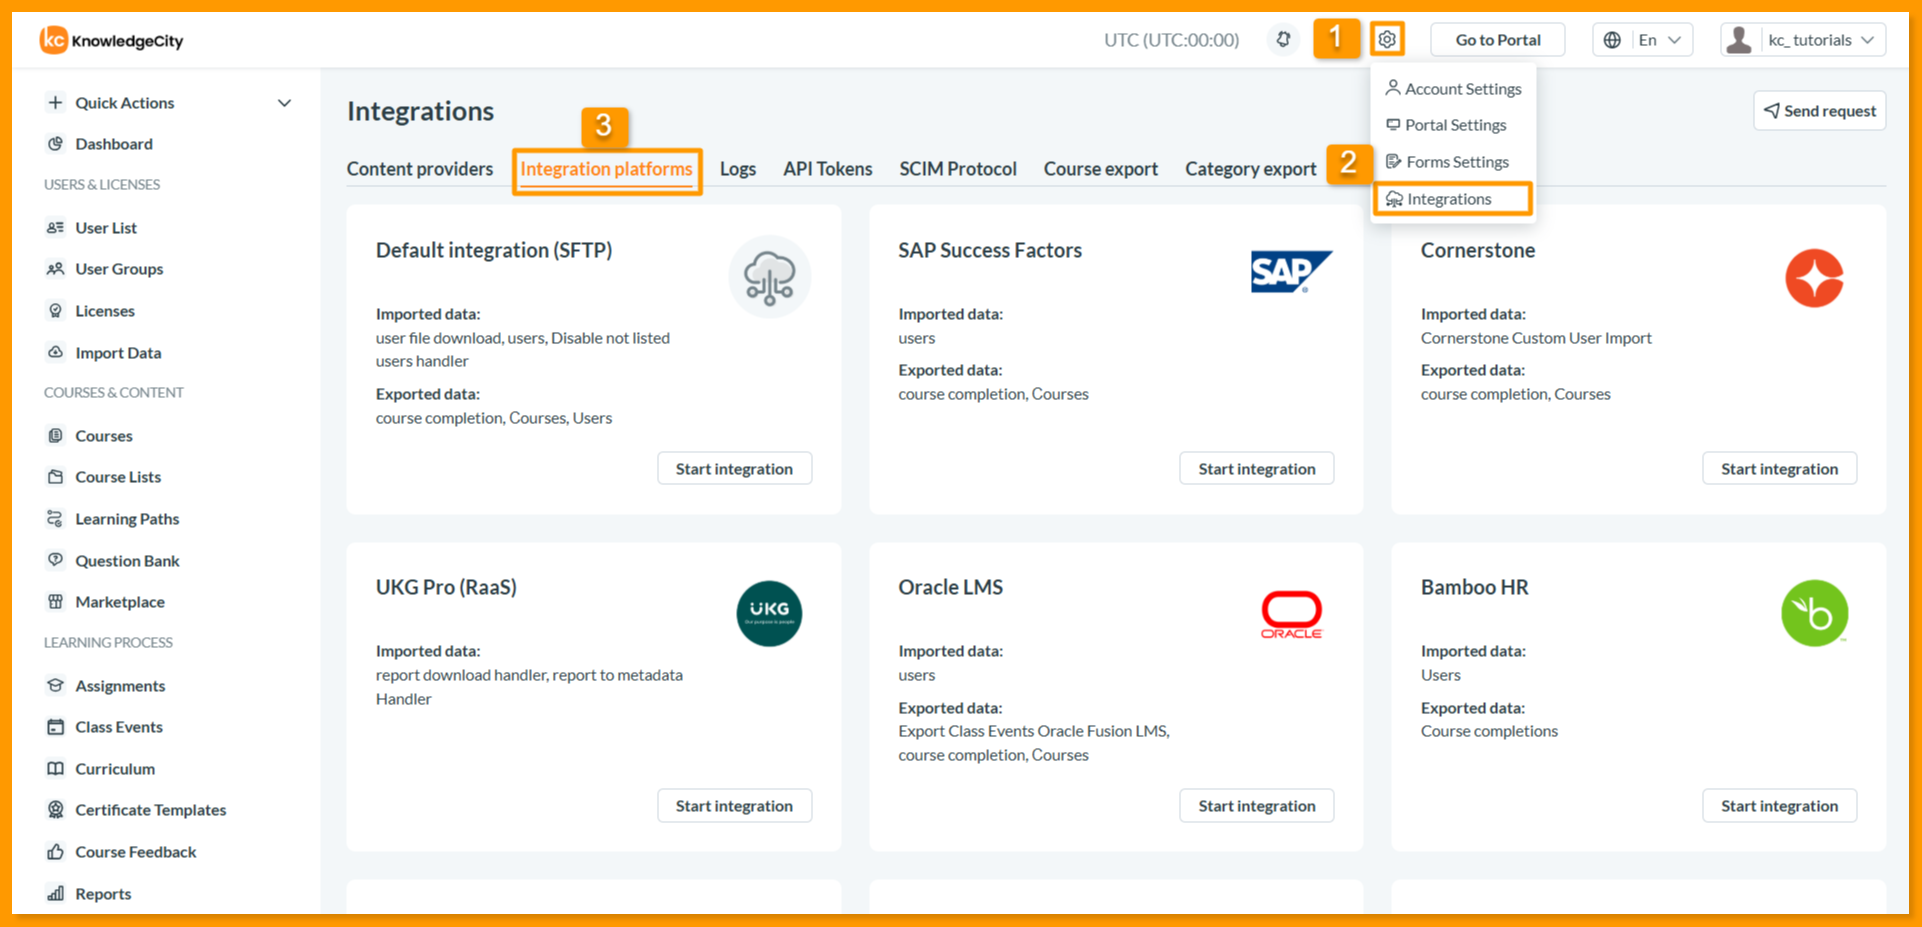
- Locate the Settings dropdown menu on the top panel of the LMS interface.
- From the dropdown, select Integrations. This will open the Integrations Detail page.
- On the Integrations page, select the Integration platforms tab. This tab displays the list of all available third-party platforms you can integrate with.
Step 2. Initiate the Integration
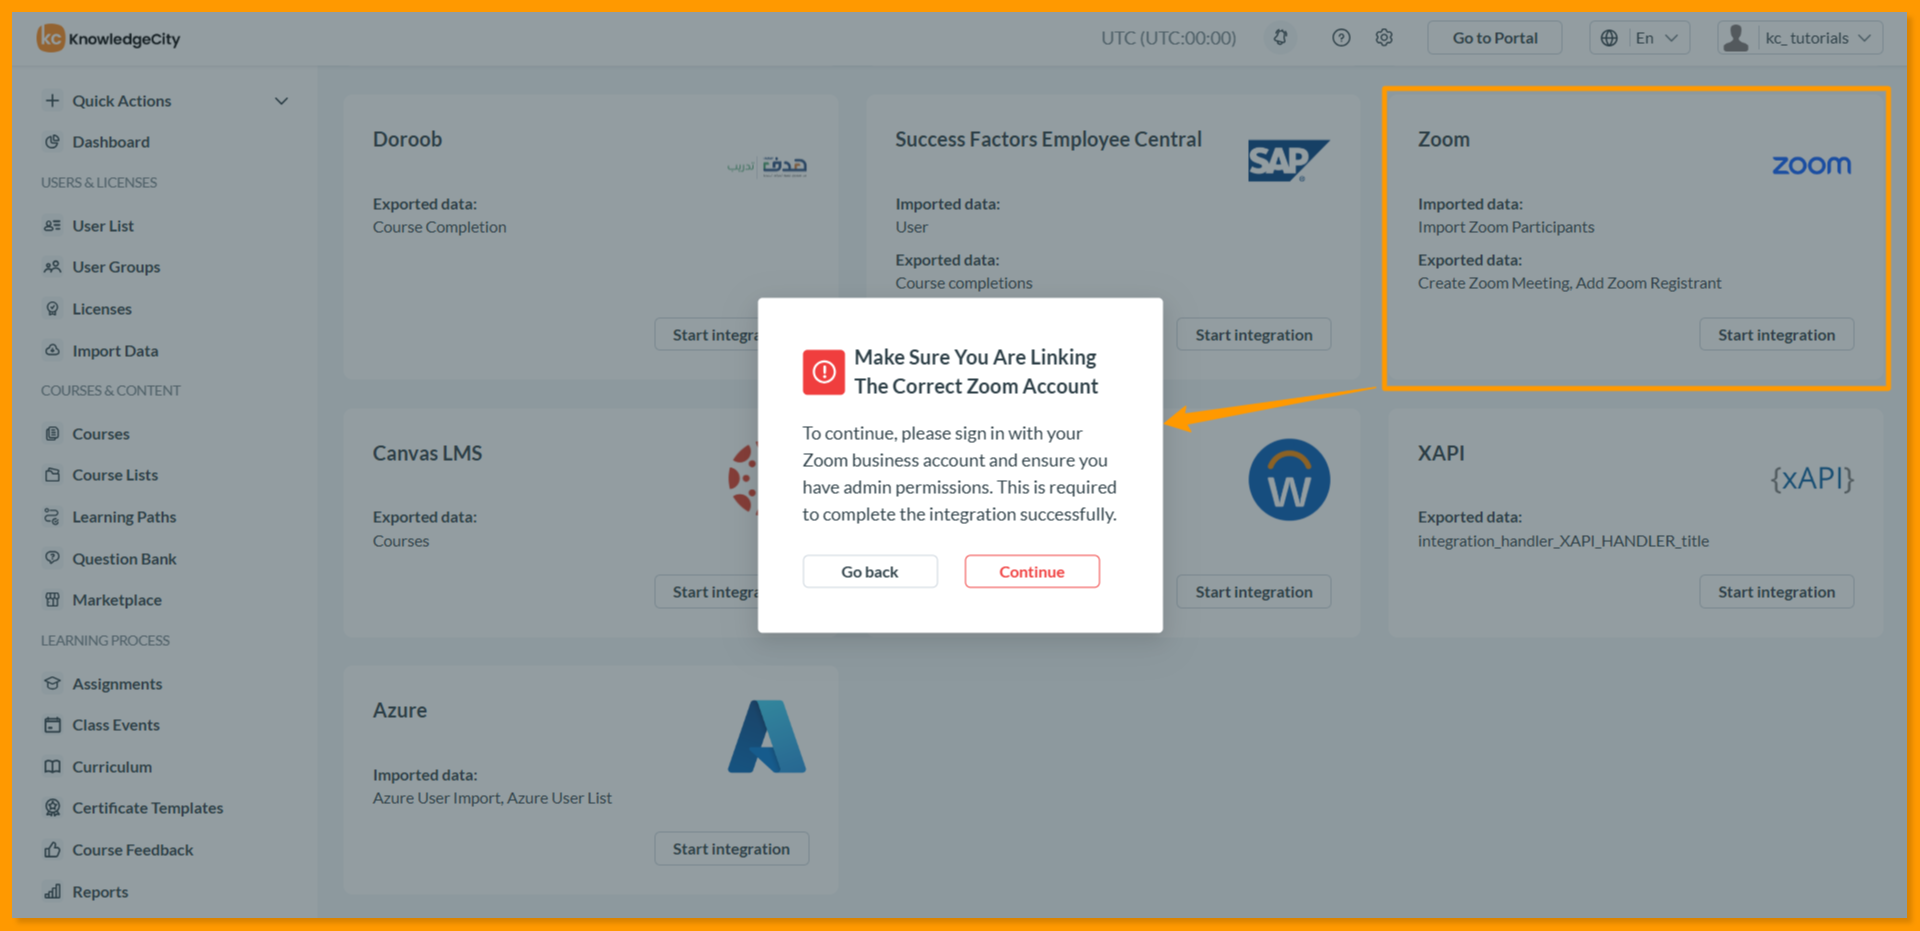
- Scroll down the list to locate the Zoom.
- On the Zoom card, click the Start integration button.
- A popup window will appear, prompting you to verify your account details. It will display the following message:
Make sure you are linking the correct Zoom account To continue, please sign in with your Zoom business account and ensure you have admin permissions. This is required to complete the integration successfully.
- Click the Continue button in the popup to proceed.
Step 3. Authorize Zoom Permissions
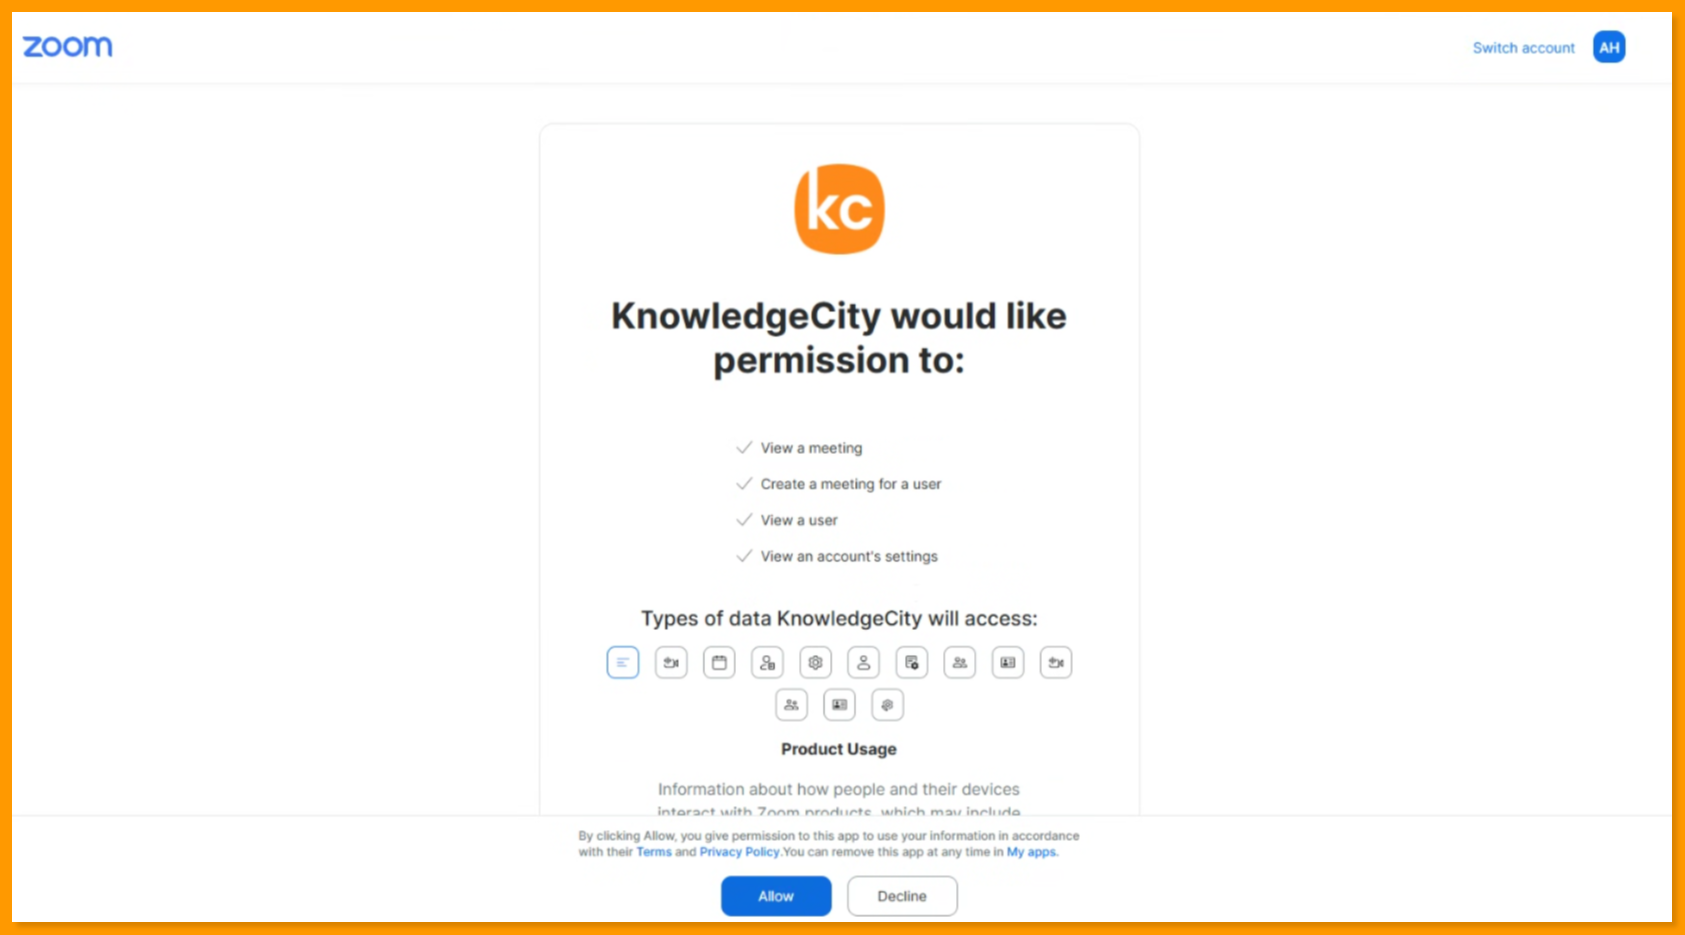
- Clicking "Continue" will redirect you to the Zoom authorization page.
- Zoom will ask you to grant permissions to KnowledgeCity. Review the requested permissions:
- View a meeting
- Create a meeting for a user
- View a user
- View an account's settings
Note: Verify you are logged into the correct Zoom Business admin account. Or you may "Switch account" if necessary.
- To complete the integration, click the Allow button.
Step 4. Confirm Successful Integration
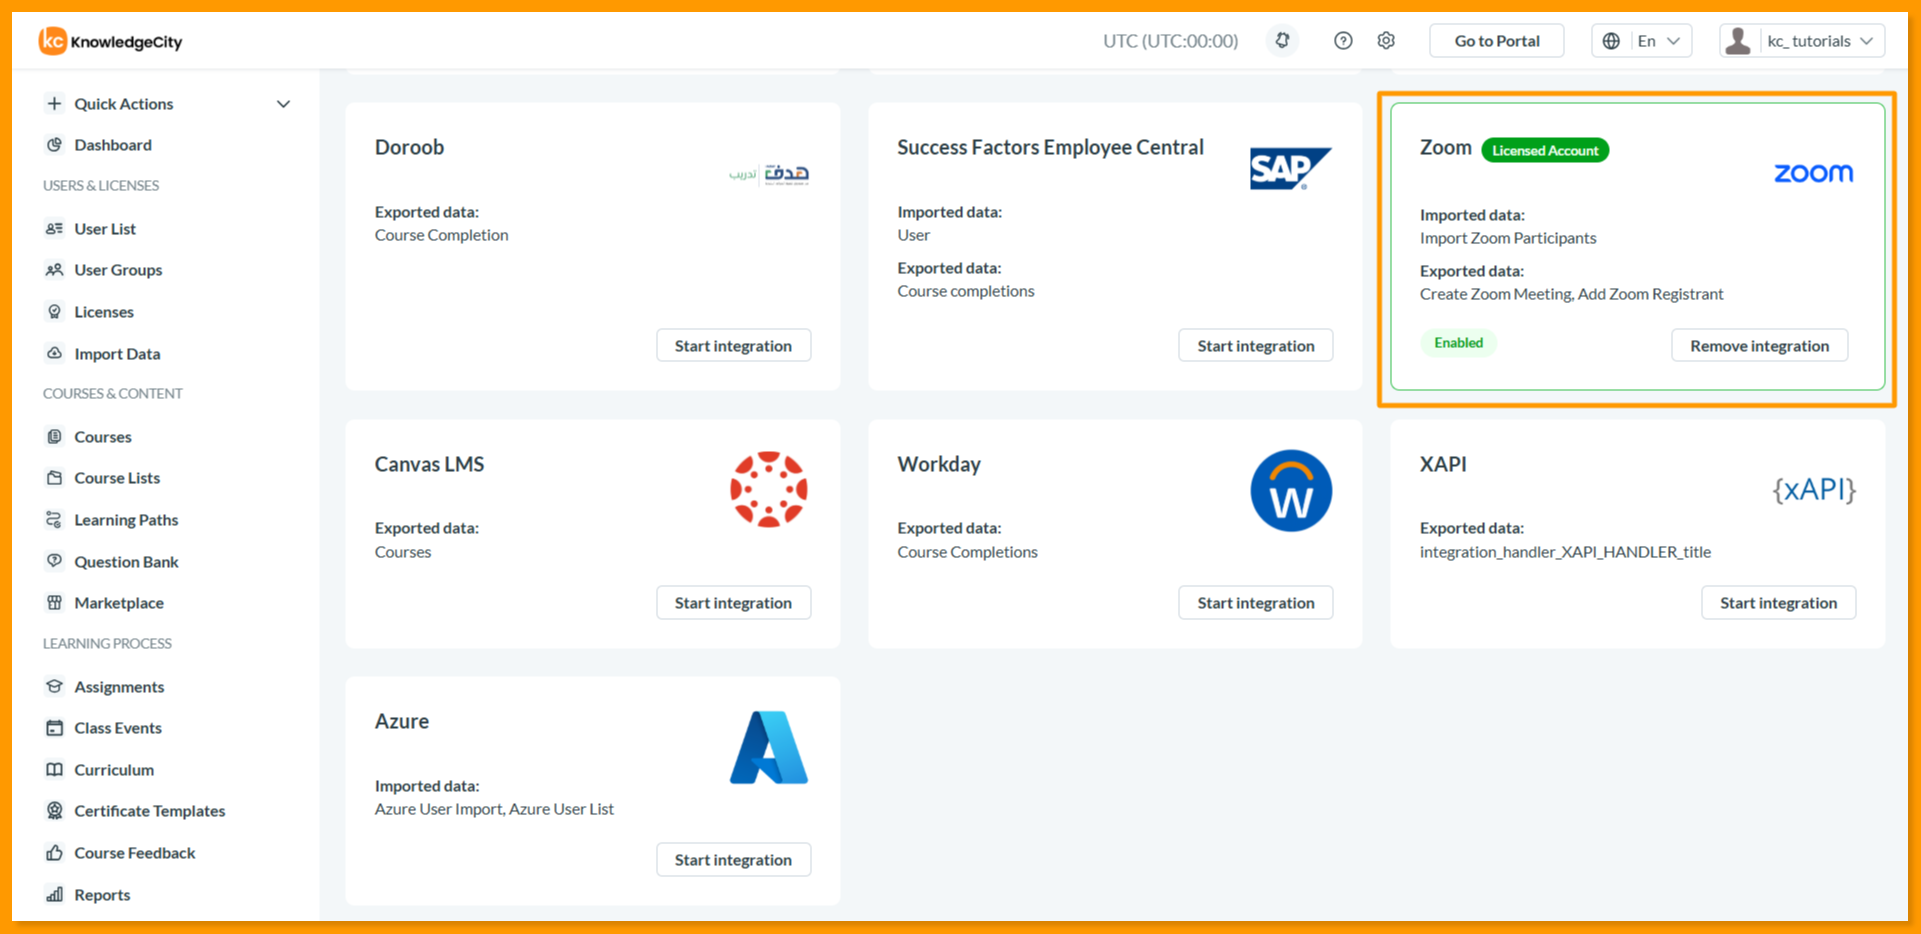
- After clicking Allow on the Zoom permissions page, you will be automatically redirected to the KnowledgeCity LMS Integration Platforms page.
- The integration is successfully completed when the Zoom integration card:
- Is highlighted in green
- Displays the linked account details with the title updated (e.g., Zoom Licensed Account)
- Shows an Enabled status on the card
- Replaces the Start Integration button with the Remove Integration option
- To disconnect the integration at any time, click the Remove Integration button on the same card.
Conclusion
You have successfully integrated your Zoom Business account with KnowledgeCity LMS. You can now leverage this connection to streamline the creation of virtual classes, manage registrations, and track participant data directly within your LMS environment. When creating new online class events, you will now see a dedicated Zoom option available, allowing for seamless session setup without any manual intervention. If you ever need to disconnect the accounts, simply reopen the Zoom Integration card and click Remove integration.