





Summary
A comprehensive guide on how to create a new individual user profile in the KnowledgeCity LMS.
Introduction
KnowledgeCity LMS provides a streamlined process for creating new User Profiles that allows for easy tracking and managing of an individual's learning progress. The user profiles include basic information such as usernames and passwords, and can be further customized with additional fields based on organizational and administrative requirements, such as roles, group associations, and custom fields.
Steps to Follow
Creating a new user in the KnowledgeCity LMS is a straightforward process. The following steps will guide you through the user creation process:
Step 1: New User Profile Creation
- Navigate to the Quick Actions tab in the top-left panel of the LMS interface.
- Click on the Create User button to initiate the process.
- Alternatively, from the User List page, click the button in the top-right corner of the page for "Create user".
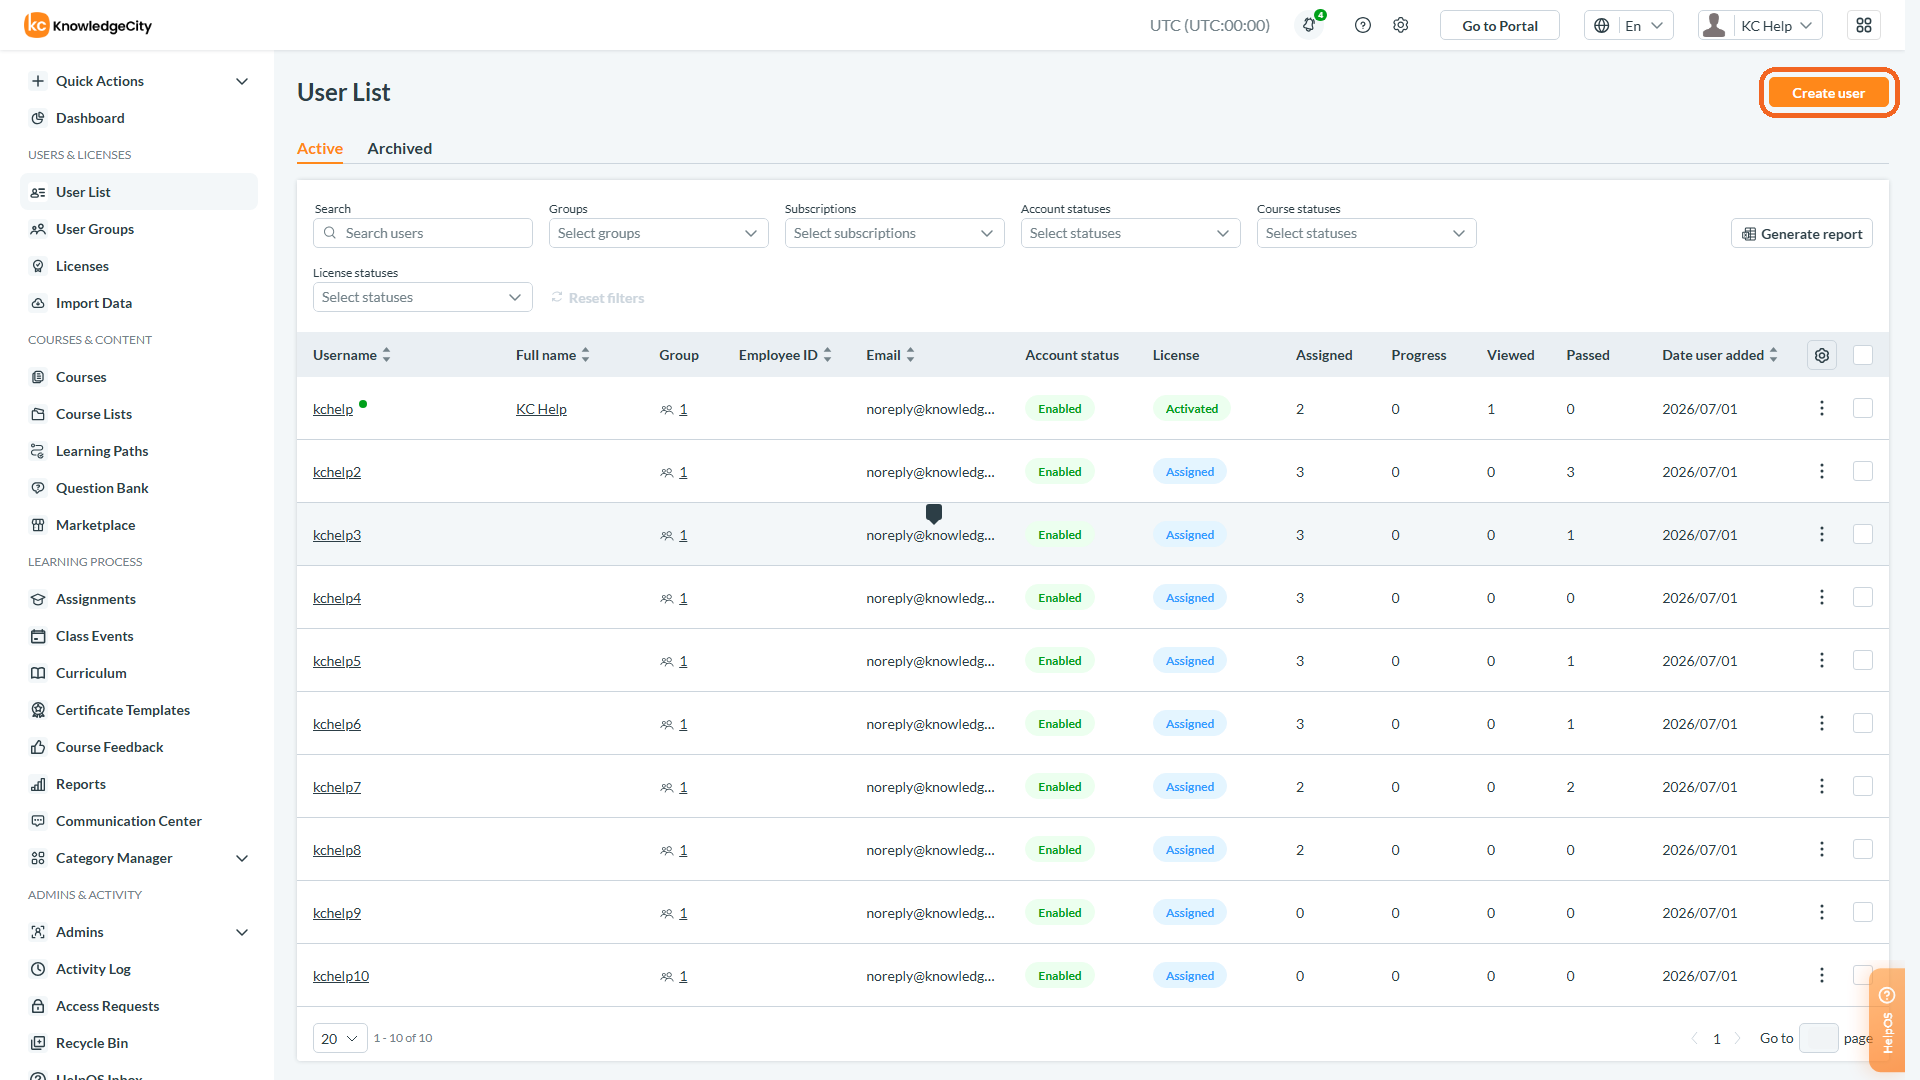
Caption: The User List page, with the Create user button in the top-right corner highlighted.
Step 2: Filling in the User Details
- The Create user form will appear with fields that need to be filled out.
- The form includes required fields marked with an asterisk (*), such as Username and Password. Note that the password field comes pre-filled with a system-generated value for convenience.
- Fill out the necessary information for the new user. Typically, this will include:
- Username (Minimum length: 4 allowed characters)
- Password
- First Name
- Last Name
- Email address
- Employee ID (if applicable)
- National ID, Date of birth, City, Center, Nationality, Company, Department, Position, Phone Number and Gender.
- Other fields displayed are determined by the settings configured by the admin in the Settings > Form settings > LMS user profile section. These fields may have different names depending on the language settings of your portal and can be made mandatory or editable depending on the form settings. These form settings are tied to new Custom Fields in the Settings > Form Settings > Custom Fields settings.
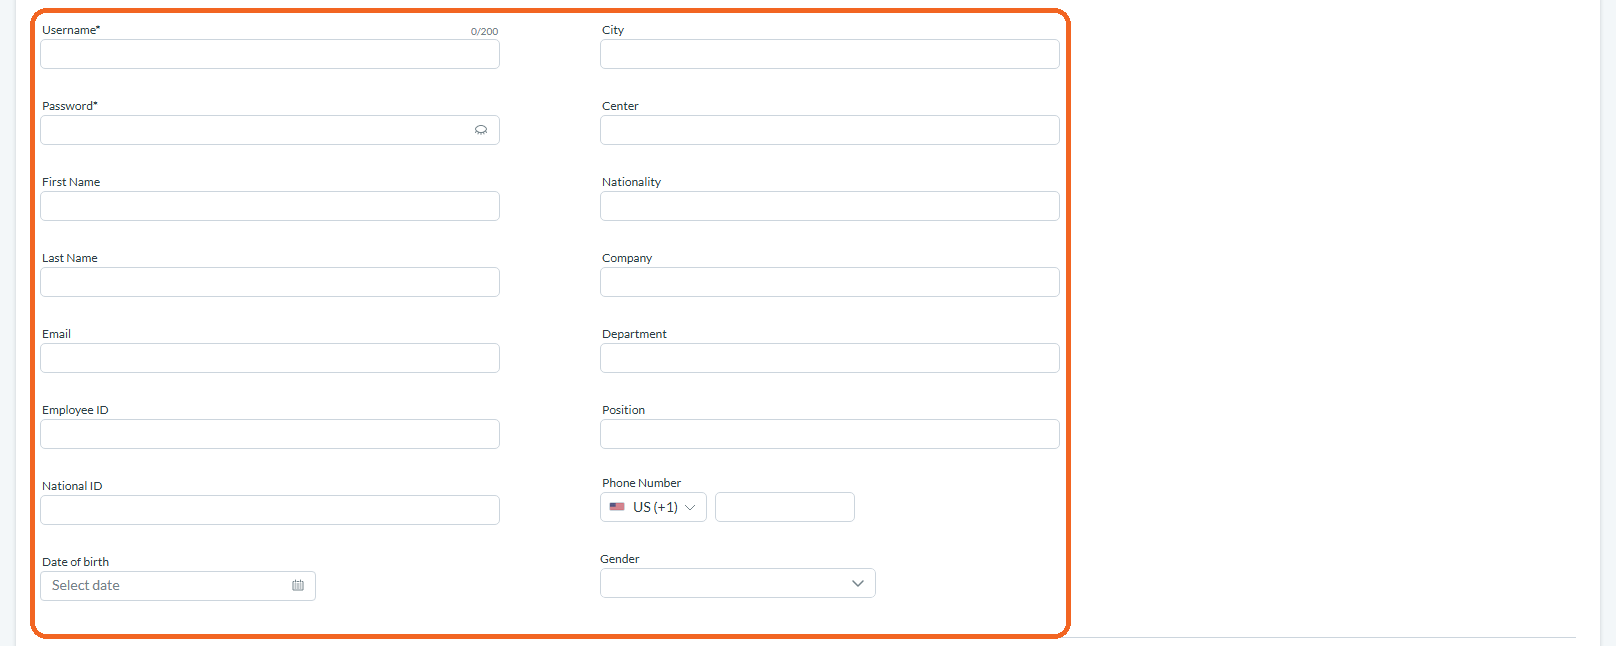
Caption: The Create user form, showing the required fields marked with an asterisk alongside the optional profile fields.
Step 3: Setting User Groups and Permissions
- For accounts with multiple user groups, the form will come pre-populated with one group set as the default for the account. Admins cannot remove a group if there is only one group present in the block.
- Each student must be assigned to at least one group. Without changes, the Default group is assigned by default.
- Administrators with Full Access will have access to the Grant administrator permission switcher, allowing them to assign administrative roles as needed. The user can be given Full Access or a custom set of scoped roles.
- The Create new user button will remain inactive until all required fields are filled out.

Caption: The User Permissions block with the Grant admin role switcher, above the User Groups block and its pre-populated default group.
Step 4: Completing the Creation Process
- Admin can also configure the new user’s Time zone and preferred Email language as required, and select or clear the Send notification to user about changes checkbox to control whether an automatic email notification is sent upon account creation.
- Once all the required fields are filled, the admin should click the Create new user button to finalize the user's addition to the LMS.
- Upon successful creation, the system will redirect to the user's new profile page, and a confirmation message will be displayed to confirm that the new user has been added to the LMS.
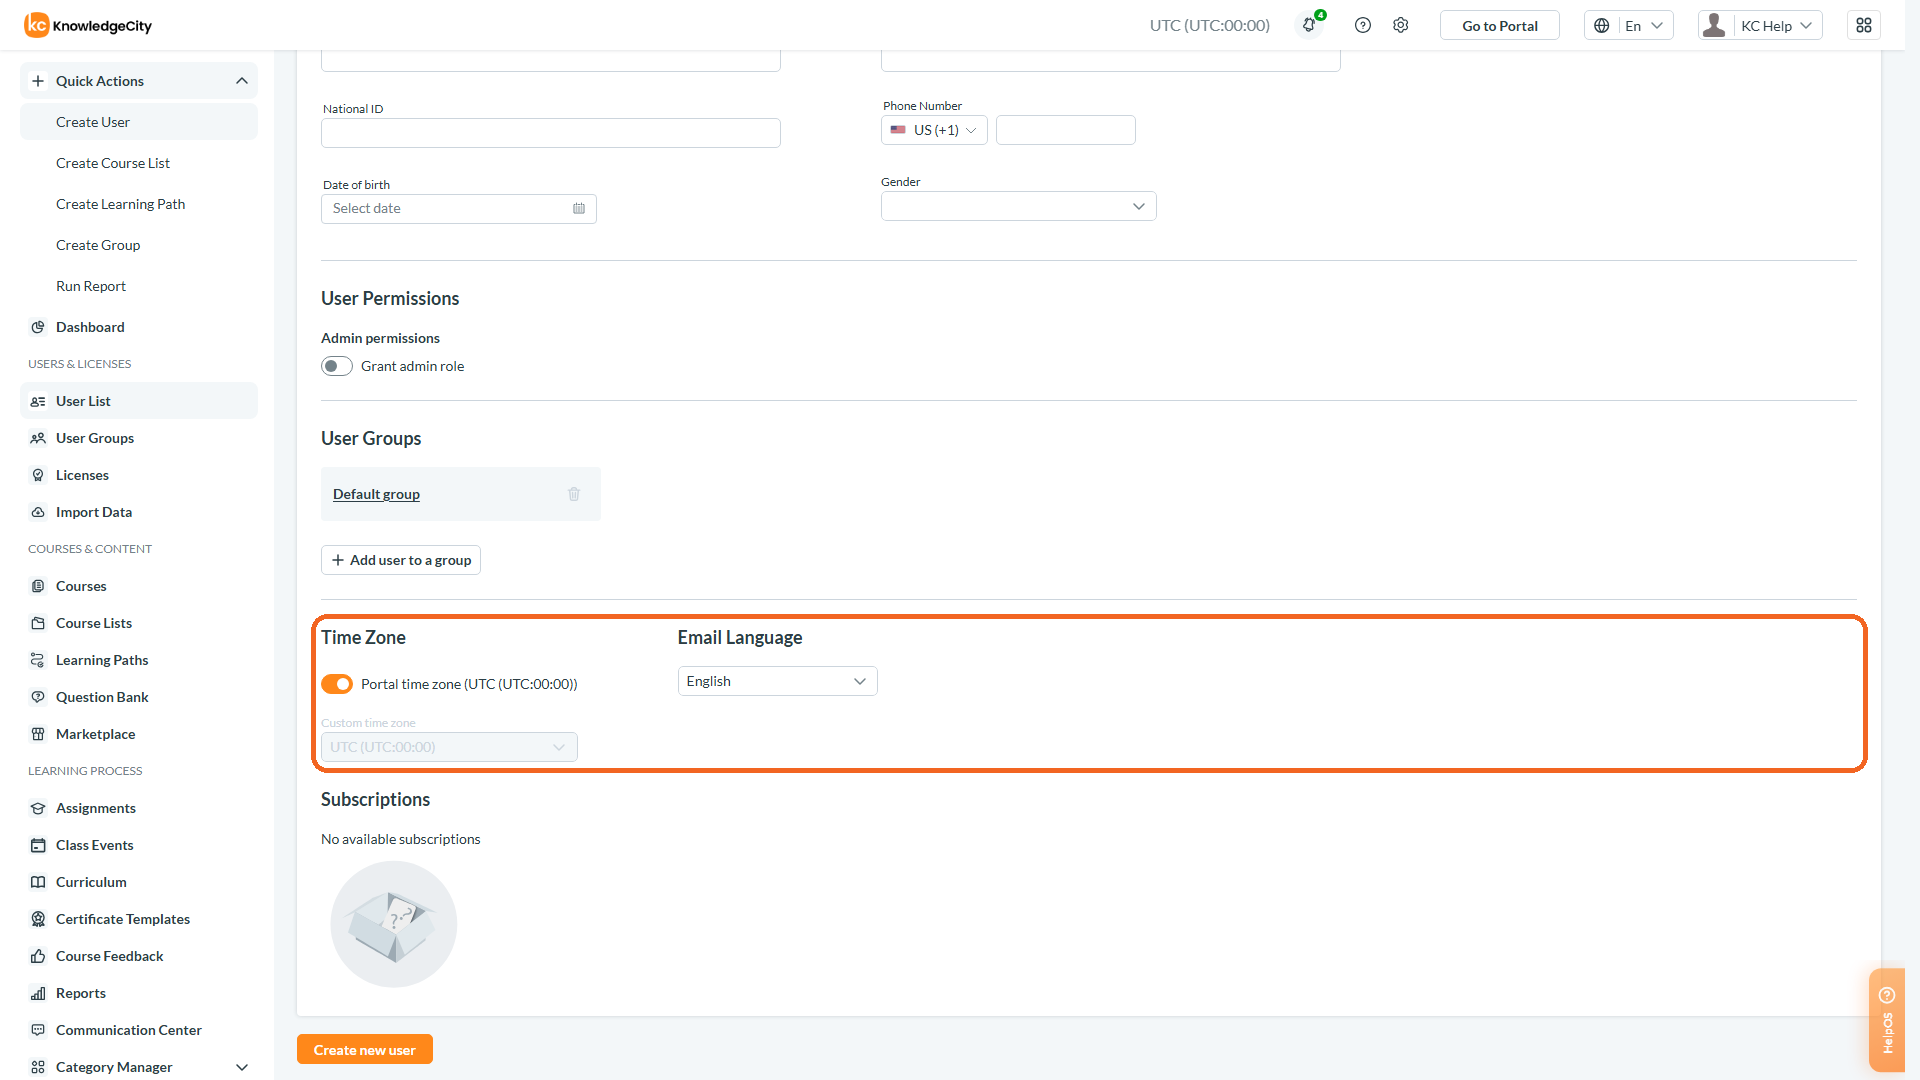
Caption: The foot of the form: the Time Zone and Email Language settings, with the Create new user button below them.
Step 5: Reviewing Profile Data and User Profile Configuration Options
- Once the new profile is created, the admin may choose to add a profile photo for the new user by browsing for an image file.
- New profile settings will now be available, such as Changing the user's password, Reset login info, Learning permissions settings, resetting MFA settings, Line manager and disabling or deleting the user.
- New profile tabs navigation will now be available for:
- User data: The profile field information (opened automatically)
- Assignments: Assign courses and Learning Paths to the user
- Statistics: Review course progress and historical training records
- Event list: View the user's enrolled class events
- Licenses: View and manage the account licenses assigned to the user
- Access Schedules: Control the user's access to the portal for viewing courses
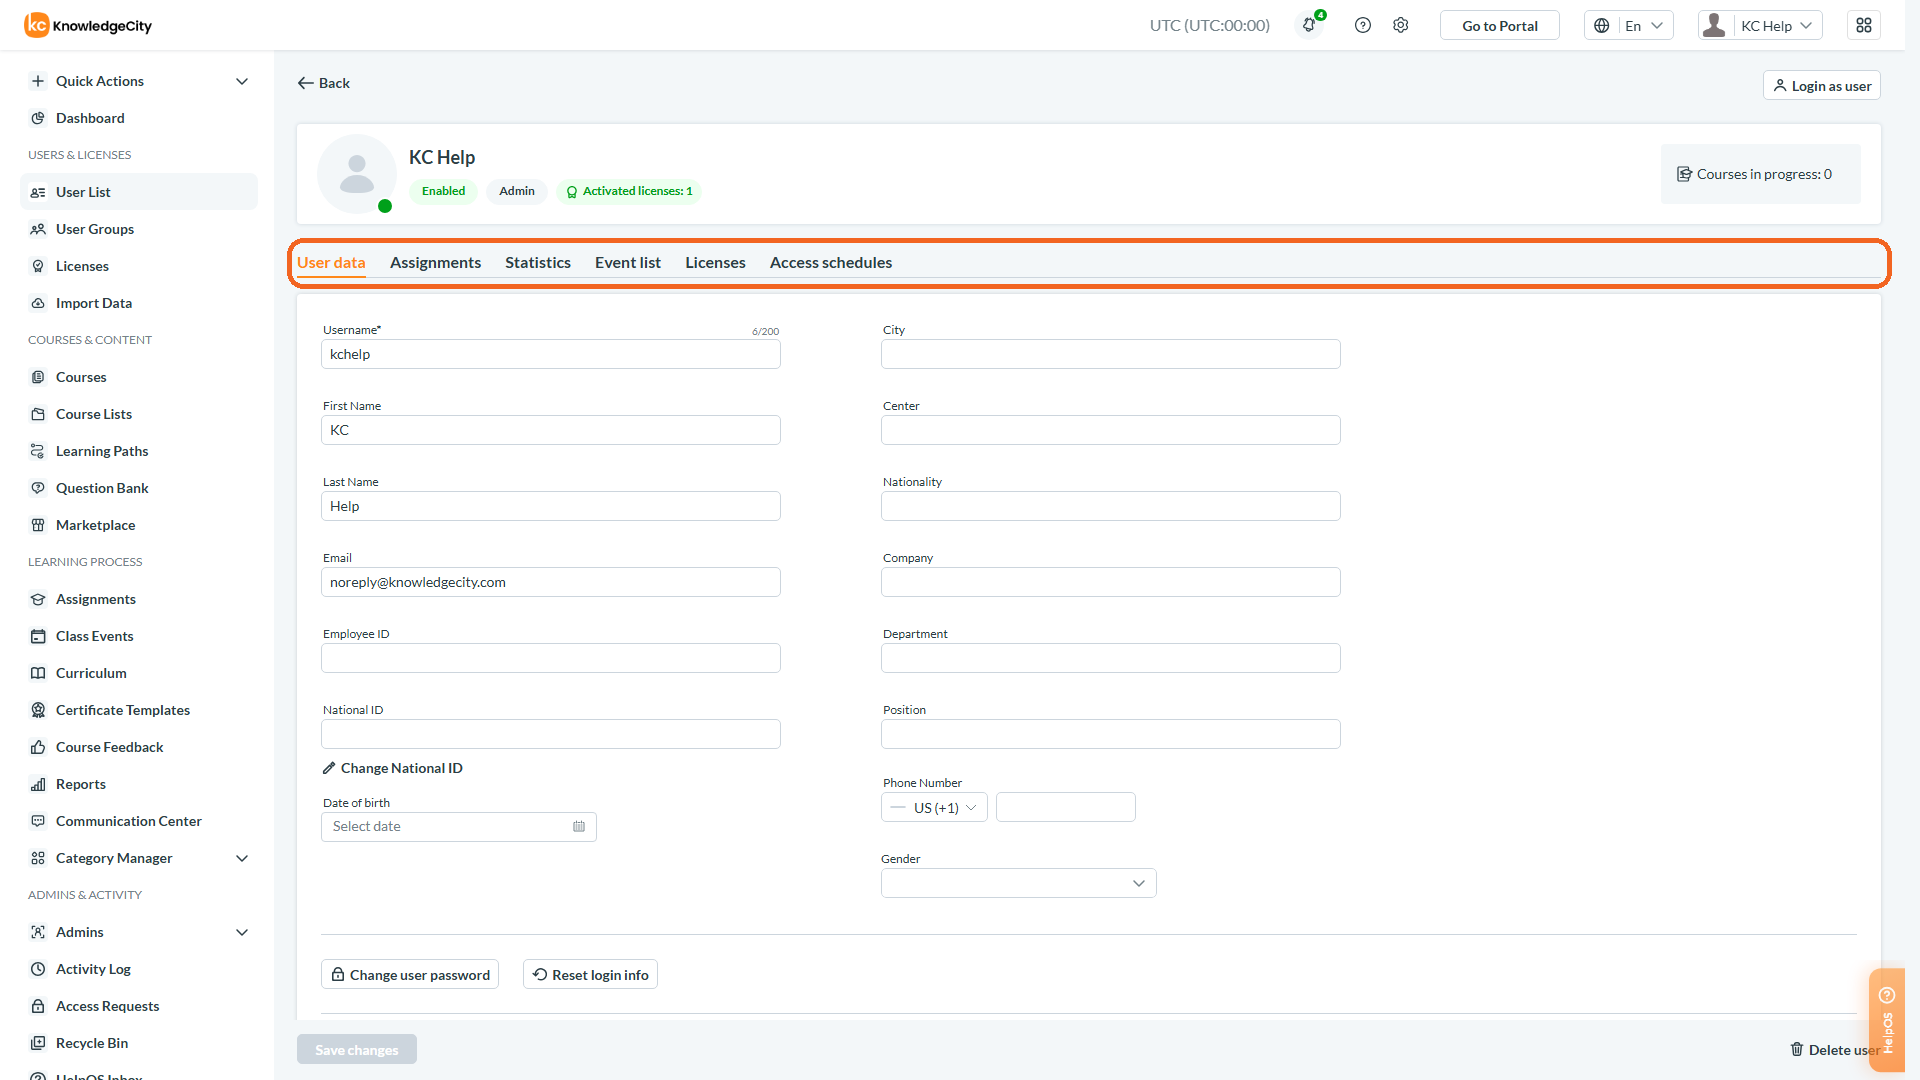
Caption: The saved user profile, with the User data, Assignments, Statistics, Event list, Licenses and Access schedules tabs highlighted.
Conclusion
By following these steps, you can efficiently add new users to your KnowledgeCity LMS, allowing them to start their learning journey with the necessary access and information to succeed.