





Summary
Safety App lets you attach supporting photos and files to an incident so the record shows what actually happened. You add these attachments as part of the incident reporting wizard, dropping in images or PDF documents that back up your description. The result is an incident record that carries its own evidence, making it easier to review and act on.
Introduction
When you report a workplace incident such as an injury, a near miss, or property damage, a plain description often is not enough. Attachments and evidence let you include the photos and documents that show the scene, the damage, or the conditions involved, so reviewers get the full picture.
Anyone who reports an incident in Safety App can add attachments while completing the reporting wizard. The attachment step sits alongside the other details you capture, so supporting evidence is gathered in the same place as the rest of the report.
Key Concepts
- Evidence and photos: the supporting files you attach to an incident, including images and PDF documents that help demonstrate what happened.
- Attachment step: the point in the incident reporting wizard where you add supporting files before you review and submit.
- Supported file types: Safety App accepts JPEG, PNG, GIF, WEBP, and PDF files as incident attachments.
- File size limit: each file you attach can be up to
10MB. - Drag and drop upload: you can add files by dragging them into the upload area rather than only browsing for them.
- Part of the incident record: attachments are captured with the rest of the report, so they stay tied to the incident you are documenting.
Steps to Follow
Reach the attachment step in the wizard
Start a new incident report and work through the earlier steps of the wizard, where you choose your report mode, select the incident category, describe what happened, and record who was affected. Continue until you reach the step for attaching evidence and photos.
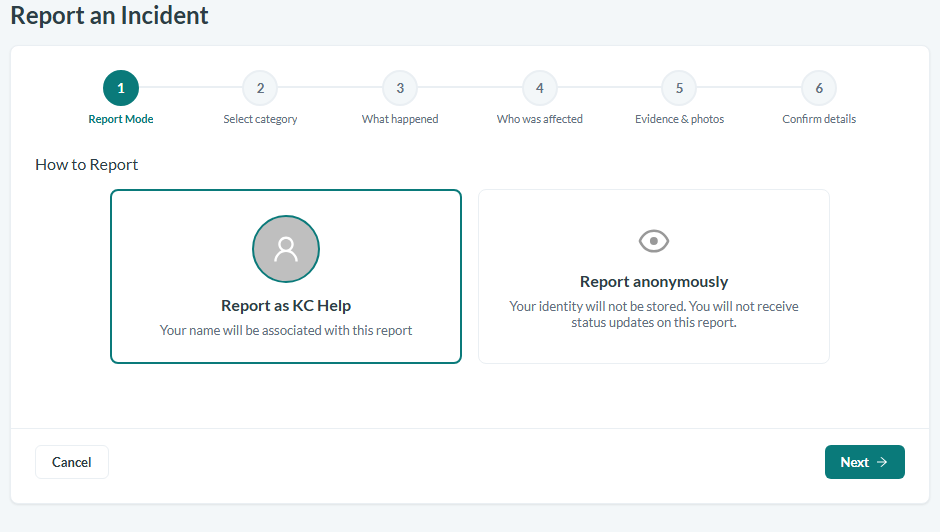
Caption: The wizard opens on the report mode step - work through it and the steps that follow to reach Evidence & Photos.
Prepare your files
Gather the images or documents that support the incident, such as photos of the scene or a related PDF. Confirm that each file is a supported type, JPEG, PNG, GIF, WEBP, or PDF, and that no single file is larger than 10MB.
Add your attachments
Add the supporting files to the incident. You can drag and drop files directly into the upload area to attach them, and you can add more than one file so the record reflects everything relevant.
Review and submit
Move on to the confirmation step, where you can review a read-only summary of everything you entered, including your attachments. If something is missing or wrong, jump back to the attachment step to make changes, then submit the report. Your attachments are captured together with the rest of the incident details.
Conclusion
Adding attachments and evidence gives each incident a clear, self-contained record of what happened, backed by the photos and documents you provide. By sticking to the supported file types and the 10MB per file limit, you help every attachment upload cleanly and stay linked to the incident for anyone who reviews it later.