





Summary
An API key lets an external system authenticate to the Safety App and work with your account's data programmatically. You create a key, copy it once at the moment it is generated, and give it to the system that needs it. From then on the key can be renamed, deactivated, or revoked from the API Keys settings, where you can also see when each key was last used. This article covers creating keys, reading the list, and retiring keys safely.
Introduction
Some integrations are not covered by the built-in connections. You may want to pull incident data into a business intelligence tool, push records in from another system, or automate a task that has no ready-made option. An API key is what makes that possible: it identifies a specific external system and lets it act against your account without a person signing in.
API keys are managed by Admins and Super Admins. Because a key carries the same level of access as an Admin user, this is as much a security task as a configuration one, and the article gives as much attention to retiring keys as to creating them.
Key Concepts
- API key: a credential that lets an external system authenticate to the Safety App on behalf of your account. It grants programmatic access with the same permissions as an Admin user, which is why it must be protected like a password.
- Name: the label you give a key so you can tell later what it is for. Because the key value itself is never shown again, the name is the only readable clue about which system relies on it.
- Prefix: the first few characters of the key, shown in the list. It lets you match a value held in another system to the right row here without exposing the whole secret.
- Status: whether the key is Active or Inactive. Requests made with an inactive key are rejected.
- Last Used: when a request was most recently authenticated with the key. This is the field that tells you whether a key is still doing a job or has been forgotten.
- Expires: the expiry date, if one was set. An expiry forces a rotation rather than leaving a key valid indefinitely.
Steps to Follow
Opening the API Keys settings
Sign in as an Admin or Super Admin, open Settings, then the Integrations group, then API Keys. The page lists every key on the account with its name, prefix, status, last use, expiry, and creation date. A usage reference is shown at the bottom of the panel for whoever is wiring up the calling system.
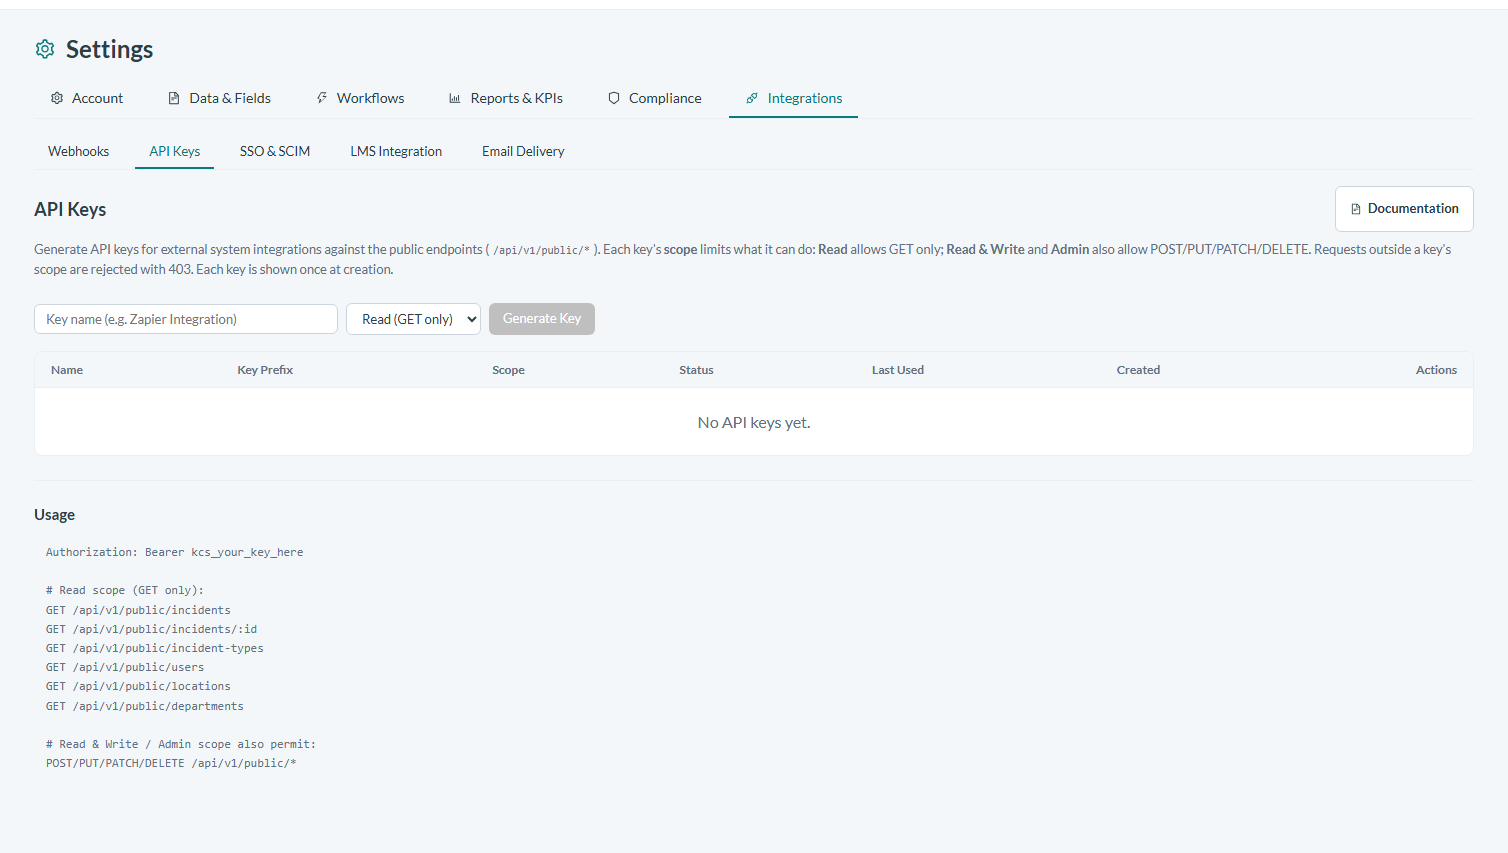
Caption: Sign in as an Admin or Super Admin, open Settings, then the Integrations group, then API Keys.
Creating a key
In the field at the top of the API Keys panel, enter a Name that says which system will use the key and what it does, then select Create API Key. A dialog opens showing the full key value.
Copy the key now and store it where it belongs: a password manager, a secrets vault, or your build system's secret store. The full value is shown only this once. The Safety App keeps a one-way hash of it rather than the key itself, so no one, including support, can retrieve it later. If the value is lost, the only remedy is to revoke that key and create a replacement.
Handling the key safely
Treat the key like a password, because it functions like one. Do not paste it into an email or a chat message, do not commit it to source control, and do not embed it anywhere it would be delivered to a browser or a mobile app where a user could read it. Give each integration its own key rather than sharing one across several systems: when a single key is shared, revoking it to deal with one system takes down all the others at the same time.
Reading the list to spot keys you no longer need
The Last Used column is the most useful thing on this page for ongoing hygiene. A key that has not been used for a month is usually a key whose integration was retired, and every such key is access that exists for no reason. Review the list monthly and revoke anything that no longer has a purpose. The Prefix column helps here: it lets you confirm which stored value corresponds to a row before you act on it.
Renaming and deactivating a key
Select the edit icon beside a key to rename it. Renaming changes nothing about the key value or its permissions, so it is safe to do at any time and worth doing as soon as a name stops describing reality.
Select the toggle to deactivate a key without deleting it. Requests using a deactivated key are rejected straight away, but the row stays in the list for audit purposes, and you can reactivate it later. Deactivation is the right tool when you suspect a problem but are not yet certain which system a key belongs to: it stops the access immediately while leaving the record intact and the decision reversible.
Revoking a key and rotating to a replacement
Select the delete icon to revoke a key permanently. Anything still using it stops being able to authenticate immediately, and the revocation cannot be undone.
To rotate a key without an outage, create the replacement first, update the consuming system to use it, confirm the new key is working, and only then revoke the old one. Rotate on a schedule rather than only in emergencies, and rotate immediately whenever someone with access to a key leaves the team. Setting an expiry date on keys used by automated systems turns that rotation into something the account enforces rather than something a person has to remember.
Conclusion
Creating an API key is quick; the care is in what happens afterwards. Name each key for the system that uses it, copy the value once into proper secret storage, keep one key per integration, and use the Last Used column to find access that has outlived its purpose. When a key needs to go, deactivate it if you need a reversible stop and revoke it when you are certain, always creating the replacement before removing the key that is still in service.