





Summary
The Safety App can post notifications into a Slack workspace or a Microsoft Teams channel, so that safety events reach people where they already work rather than waiting to be discovered in an inbox. Both connections are set up the same way: you create an incoming webhook in the chat tool, copy the address it gives you, and paste it into the matching section of the Integrations settings. This article covers both connections and when to reach for a different tool instead.
Introduction
A safety program depends on the right people noticing something quickly. Email works, but it competes with everything else in an inbox, and a notice that arrives at the end of a shift may not be read until the next one. Most teams already have a channel where operational conversation happens, and putting safety events into that channel puts them in front of people who are already looking.
These connections are configured by a Super Admin and are deliberately simple. They are the fastest way to get safety notifications flowing into a chat tool, and no code is involved on either side. They are also independent of one another and of everything else on the Integrations page, so you can add one, remove one, or change a destination without affecting anything you have already set up.
Key Concepts
- Incoming webhook: an address created inside Slack or Microsoft Teams that accepts messages and posts them into one channel. The Safety App sends to that address; the chat tool decides where the message appears.
- Destination channel: the channel tied to the incoming webhook address. You choose it in Slack or Teams when you create the webhook, not in the Safety App, which is why changing the destination means replacing the address.
- Integrations page: the settings area where both connections live, alongside single sign-on and provisioning. Each integration on this page is configured and enabled independently.
- Webhooks feature: a separate and more flexible capability in the Safety App that lets you send a chosen set of events to any system that can receive them, with control over the content.
Steps to Follow
Deciding which tool to use
Use the Slack or Microsoft Teams connection when you want safety notifications posted into a chat channel and are happy with what the Safety App sends by default. It is a two-field setup and needs nothing built.
Use the separate Webhooks feature instead when you need to choose exactly which events are sent, control what the message contains, or deliver to something other than a chat tool, such as an automation service, a ticketing system, or an internal application. The two approaches can coexist: many organizations post general awareness into a chat channel while a webhook drives automated work elsewhere.
Creating the incoming webhook in Slack
In Slack, generate an incoming webhook address for the channel that should receive the notifications. This is done in Slack's app directory, under its incoming webhooks feature, and you will need permission in the Slack workspace to add it. When you create it, Slack asks which channel the webhook posts to, so choose the destination channel at this point. Slack then gives you an address; copy it.
Treat that address as a credential rather than a link. Anyone who has it can post messages into your channel, so avoid pasting it into a shared document or a message thread where it would outlive the setup task.
Connecting Slack to the Safety App
Sign in as a Super Admin, open Settings, then the Integrations group, then SSO & SCIM, where the Slack and Microsoft Teams sections sit alongside the identity settings. In the Slack section, paste the incoming webhook address into the field, then select Save.
From that point, notifications for new incidents and for high-severity events are sent to the channel associated with that address. Because the destination is carried by the address itself, moving notifications to a different Slack channel means creating a new incoming webhook there and replacing the value here.
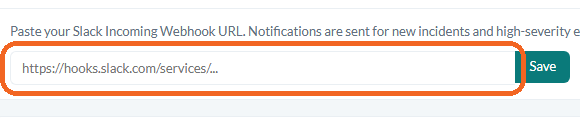
Caption: Sign in as a Super Admin, open Settings, then the Integrations group, then SSO & SCIM, where the Slack and Microsoft Teams sections sit alongside the identity settings.
Creating the incoming webhook in Microsoft Teams
In Microsoft Teams, configure an incoming webhook connector on the channel that should receive the notifications, and copy the address it provides. As with Slack, the connector belongs to one channel, so the channel you pick when creating it is the channel that will receive messages, and you will need the necessary permission on that team to add a connector.
Connecting Microsoft Teams to the Safety App
In the Microsoft Teams section of the same page, paste the address you copied, then select Save. Notifications are then delivered to that Teams channel.
Confirming it works and changing it later
After saving, the practical confirmation is a real event: the next qualifying activity in the Safety App should appear in the channel. It is worth checking rather than assuming, because a mistyped or truncated address fails quietly at the chat tool's end rather than being reported back inside the Safety App.
To stop notifications, remove the stored address from the section. To redirect them, replace it with an address for the new channel. To retire the destination entirely, delete the incoming webhook in Slack or Teams as well, so the address stops working even if a copy of it survives somewhere.
Conclusion
Connecting Slack or Microsoft Teams is a short task with a long payoff: safety events land in a place people are already watching. Create the incoming webhook in the chat tool, choosing the destination channel there, paste the address into the matching section of the Integrations settings, and save. Keep the address as private as any other credential, confirm with a real event that messages are arriving, and move to the Webhooks feature when you need control over which events go out and what they contain.