





Summary
Single sign-on lets your people reach the Safety App with the corporate credentials they already have, and SCIM keeps their accounts in step with your directory without anyone maintaining them by hand. Both are configured by a Super Admin on the Integrations page: you establish trust with your identity provider, map the attributes that identify each person, and optionally require everyone to sign in that way. This article covers the full setup and the order to do it in.
Introduction
As an organization grows, two problems appear together. People accumulate one more password to manage, and administrators accumulate accounts to create, update, and switch off by hand, which means leavers keep access longer than they should. Connecting an identity provider solves both: your directory becomes the single place where access is granted and removed, and the Safety App follows it.
This is Super Admin work, usually done once with help from whoever runs your identity platform. It suits organizations that already operate a directory such as Okta, Microsoft Entra ID, Google Workspace, OneLogin, or Ping Identity, and in fact any provider that supports the SAML 2.0 standard will work.
Key Concepts
- Identity provider: the external system that authenticates your people. The Safety App trusts it to confirm who someone is, and never sees their password.
- Service provider: the role the Safety App plays in this arrangement. It receives a signed confirmation of identity from your identity provider and grants access based on it.
- Trust exchange: the setup step where each side is given the other's identifying details and signing certificate, so each can recognize messages from the other as genuine.
- Attribute mapping: the correspondence between the fields your identity provider sends and the fields the Safety App expects. The email address is the one that must be right, because it is what matches a sign-in to an account.
- SSO enforcement: an account-level setting that requires everyone to sign in through your identity provider rather than by any other route.
- SCIM provisioning: automatic creation, updating, and deactivation of Safety App accounts driven by your directory, so account lifecycle follows joiners, movers, and leavers without manual work.
Steps to Follow
Opening the Integrations settings
Sign in as a Super Admin, open Settings, then the Integrations group, then SSO & SCIM. Everything in this article is configured here. Each integration on this page works independently, so you can set up single sign-on without touching anything else, and turn one connection off without affecting the others. Note that the KnowledgeCity LMS connection is configured on its own page under Settings, not here.
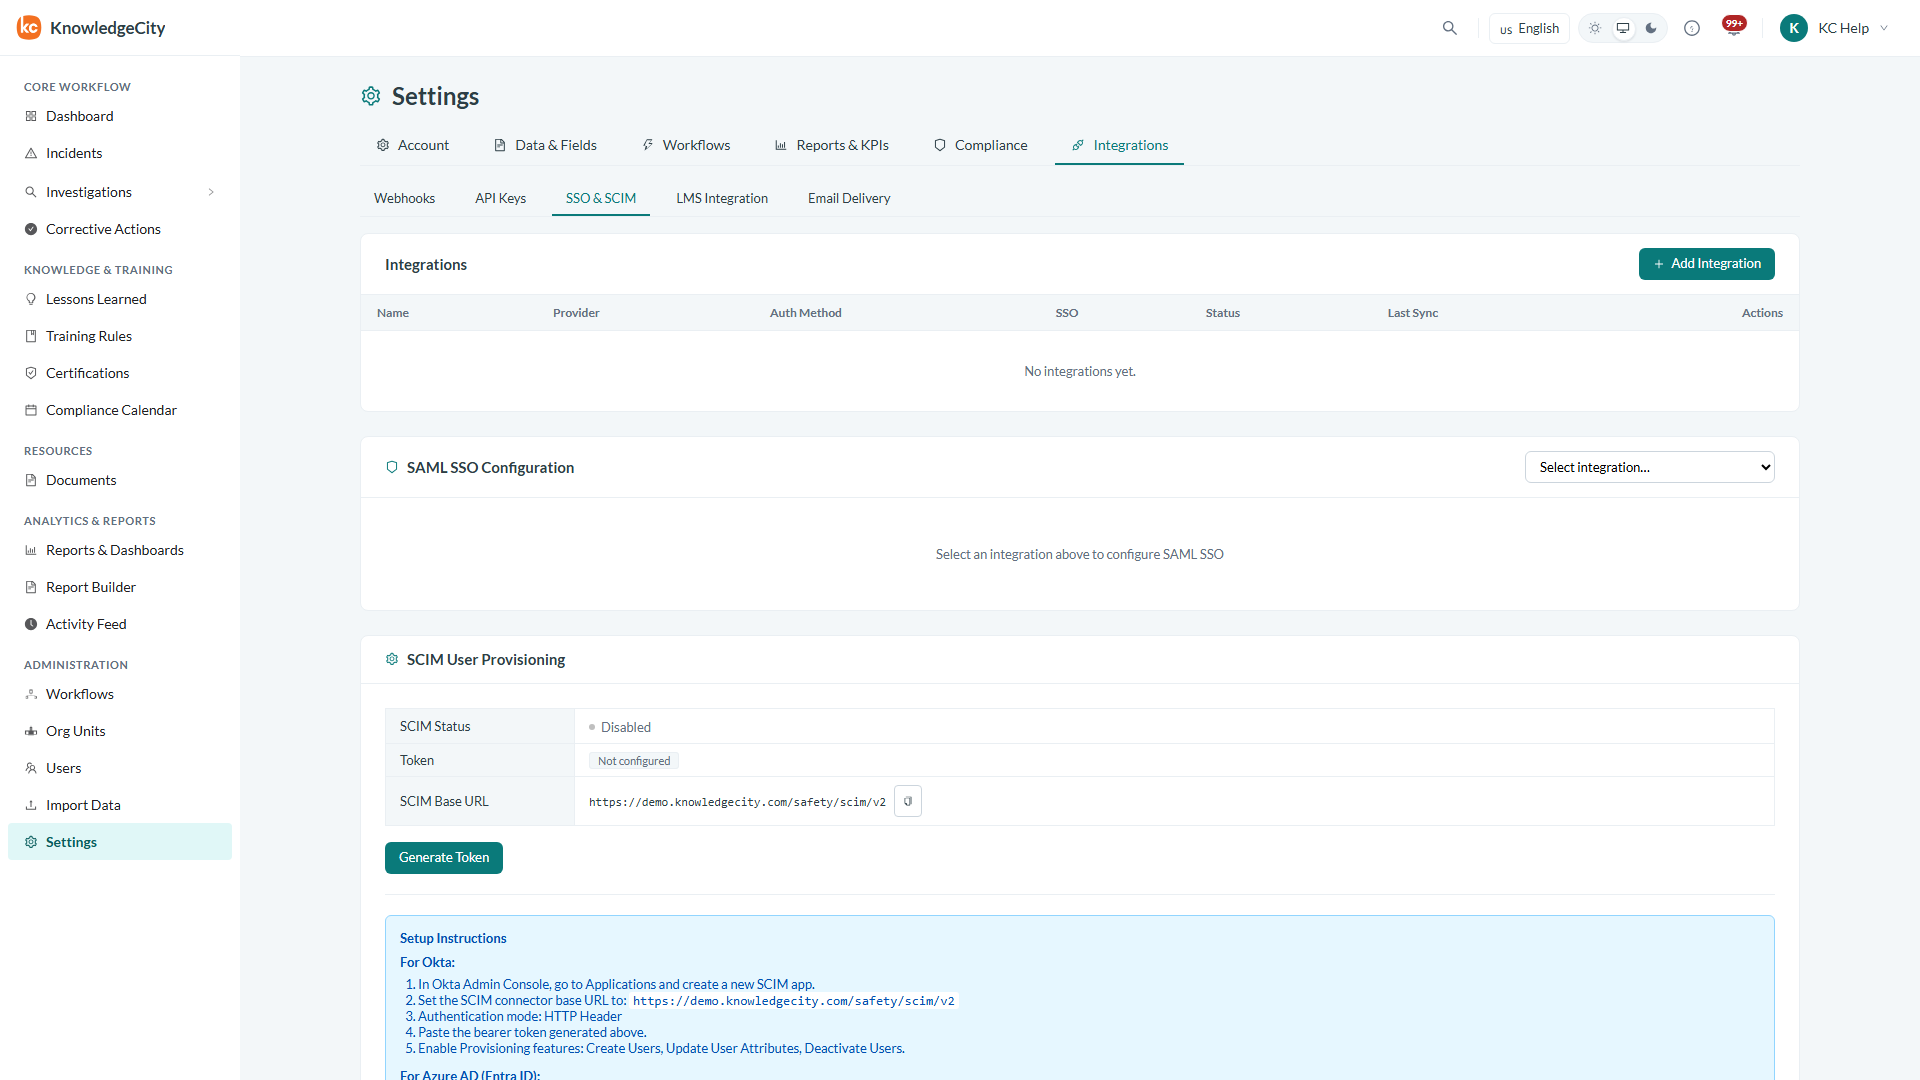
Caption: Sign in as a Super Admin, open Settings, then the Integrations group, then SSO & SCIM.
Creating the integration record
Select + Add Integration and fill in the integration details, including its name, the provider, and the authentication method, then save. The new integration appears in the integrations table. Below that table, in the SAML SSO Configuration section, select your new integration from the dropdown to begin configuring it. Creating the record first and configuring it second is the order the page expects.
Exchanging details with your identity provider
In your identity provider's admin console, create a new SAML application, and give it the service provider values the Safety App displays: the SP Entity ID, which identifies the Safety App, and the ACS URL, which is where your provider sends someone after it has authenticated them.
Then bring three values back the other way and enter them in the Safety App: the IdP SSO URL, which is where people are sent to authenticate; the IdP Entity ID, which identifies your provider; and the X.509 Certificate, the public certificate your provider uses to sign what it sends. With both halves in place, each side can recognize the other.
Mapping the attributes that identify each person
In your identity provider, configure the attributes sent with each sign-in. The user's email address is required and must match the email on their Safety App account: if it does not match, the person authenticates successfully with your provider and still cannot get in, which is the most common cause of a failed rollout.
You can also send first name and last name so accounts carry the right names, a role attribute if you want role assignment driven by your directory, and a department attribute, which is used to assign someone's department automatically the first time they sign in.
Testing before you announce anything
Save the configuration and test the sign-in flow before telling anyone the change is coming. Test with a real account rather than your own if you can, since an administrator's session may already be established and can hide a problem that a colleague would hit immediately.
Turning on SSO enforcement
The SSO Enforcement section requires everyone to sign in through your identity provider. It is off by default and should stay off until you have a working, active integration.
Enable enforcement only after you have confirmed the sign-in flow works, because turning it on without an active SSO integration would leave your users unable to get in at all. KnowledgeCity master admin accounts retain their access regardless of this setting, which is what makes recovery possible if enforcement is ever enabled against a broken configuration.
Setting up SCIM provisioning
In the SCIM User Provisioning section, select Generate Token. This produces a token your identity provider uses to authenticate its provisioning requests. Copy it, along with the SCIM Base URL shown on the page, and treat the token as a secret.
In Okta, create a SCIM application, set its connector base URL to the SCIM Base URL, set the authentication mode to HTTP Header and paste in the token, then enable the provisioning features you want: creating users, updating user attributes, and deactivating users.
In Microsoft Entra ID, open your application under Enterprise Applications, go to Provisioning, set the mode to Automatic, enter the SCIM Base URL as the tenant URL and the token as the secret token, then use Test Connection to confirm the link before saving and starting provisioning.
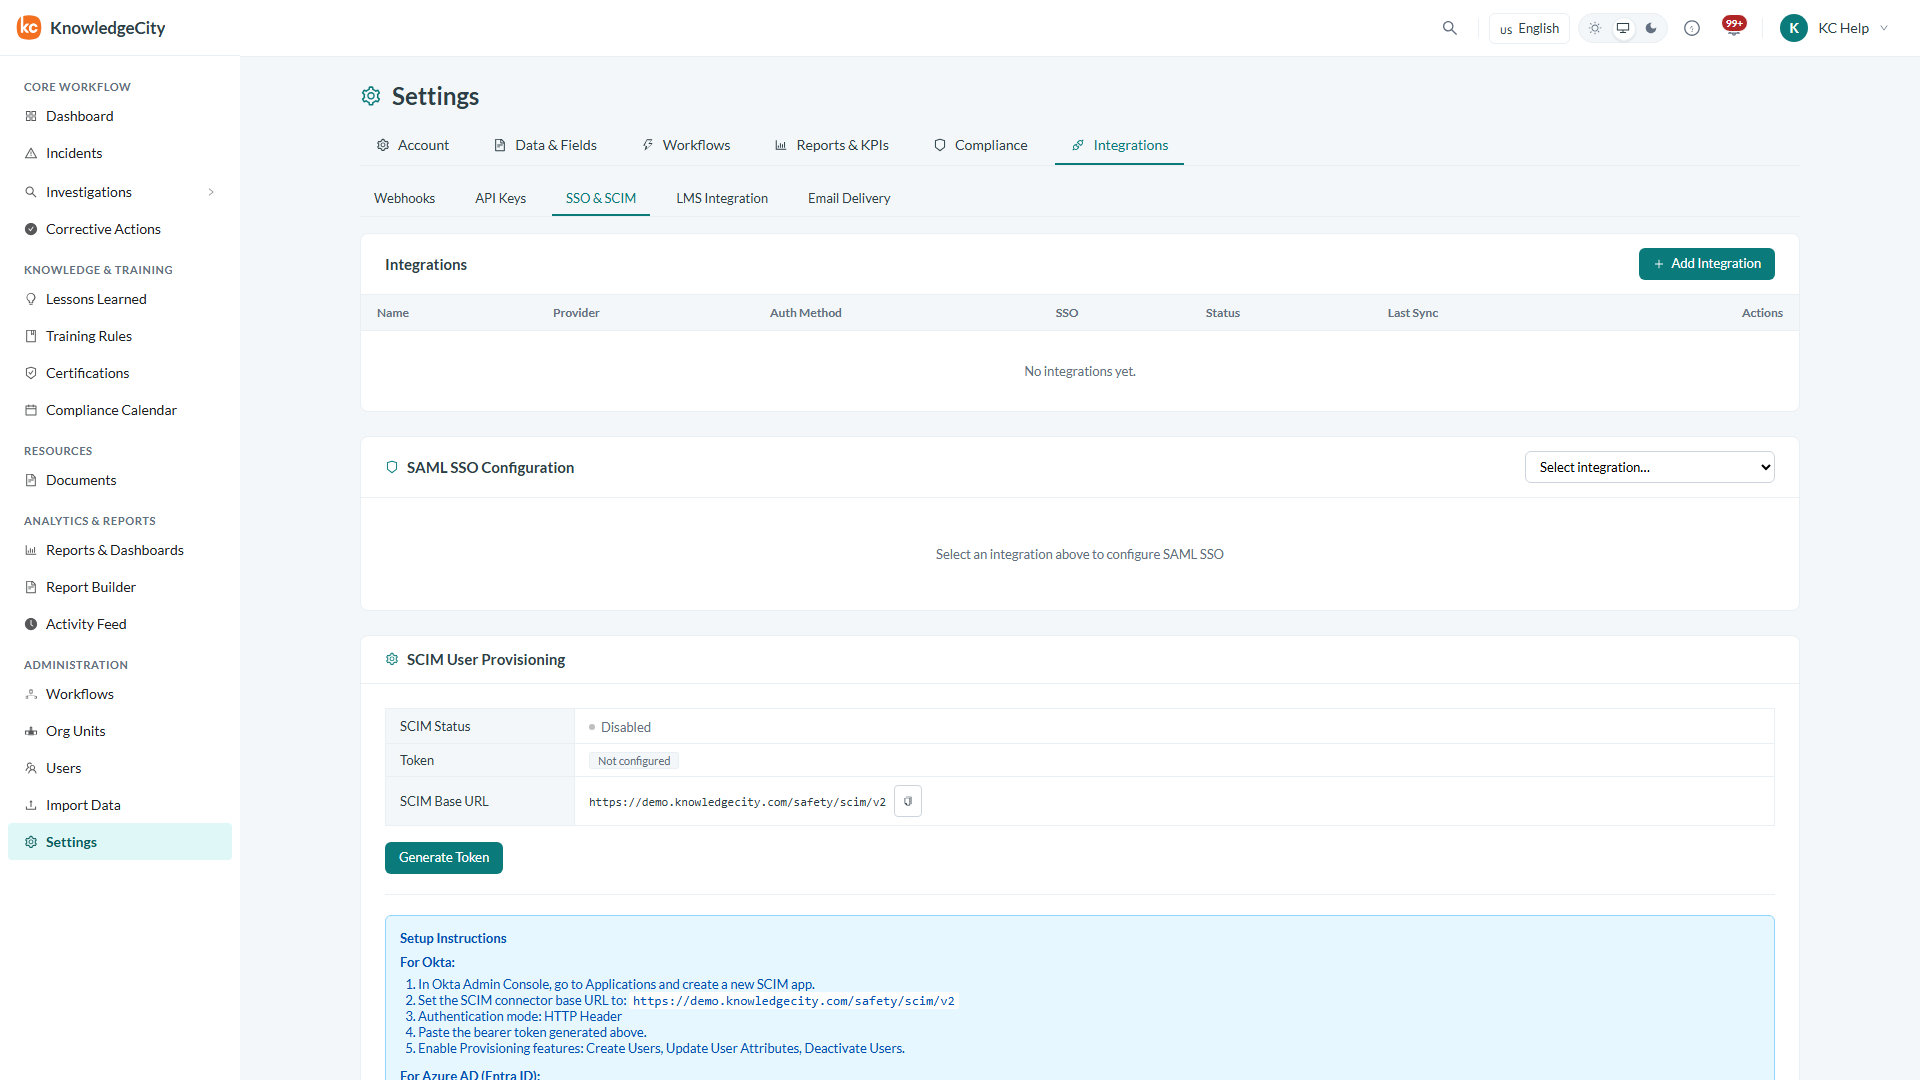
Caption: In the SCIM User Provisioning section, select Generate Token.
Conclusion
Set this up in order and each step confirms the one before it: create the integration record, exchange details with your identity provider, map the attributes with the email address as the one that must match, test the sign-in, and only then consider enforcement. Add SCIM once sign-in is working, and account lifecycle follows your directory from that point on, so someone removed there loses access here without anyone having to remember to do it.