





Summary
The Users Skill Profile page gives you a per-learner view of assessment results in KC Skills. You can filter the list by campaign, user group, status, and date range, then open any learner to see their skill gaps measured against the target proficiency for each skill.
Introduction
A campaign report tells you how a whole campaign is doing. Users Skill Profile answers the other question: how is one specific person doing, and across every campaign they have taken part in.
The page is for administrators and program owners who need to track participation and follow up with individuals. Use it to confirm who has been assessed, to see which skills a learner is short on, and to export the results for review outside KC Skills.
Key Concepts
- User profile: One learner's record of assessment results, built from the campaigns they have participated in.
- Target: The proficiency level the assessment expects for a skill, set when the assessment was built. One star means Beginner and five stars means Expert.
- Current: The proficiency level the learner actually demonstrated in their most recent quiz for that skill.
- Skill gap: The distance between Current and Target. KC Skills labels each skill On track, Behind target, Critical gap, or Not assessed.
- Overall vs By campaign: Two ways to read a profile. Overall merges results across campaigns, and By campaign splits them so you can compare one campaign against another.
- Initial and Reassessment: The two measurement points in a campaign. A reassessment repeats the measurement after training, so you can see movement.
Steps to Follow
Accessing the Users Skill Profile
Open KC Skills and select Users Skill Profile in the left sidebar. The page opens with a prompt to Select a campaign or a user group to view profiles, because profiles are always scoped to at least one of the two.
Step 1: Narrow the list to the people you care about
Use the filters across the top of the page to build your list:
- All Campaigns limits results to a single campaign.
- All Groups limits results to one LMS user group.
- Status filters by At Target, Below Target, or Not Assessed.
- Date Range covers All time, Last 30 days, Last 90 days, Last year, or a Custom Range you set yourself.
You can also type into Search profiles to jump straight to someone by name.
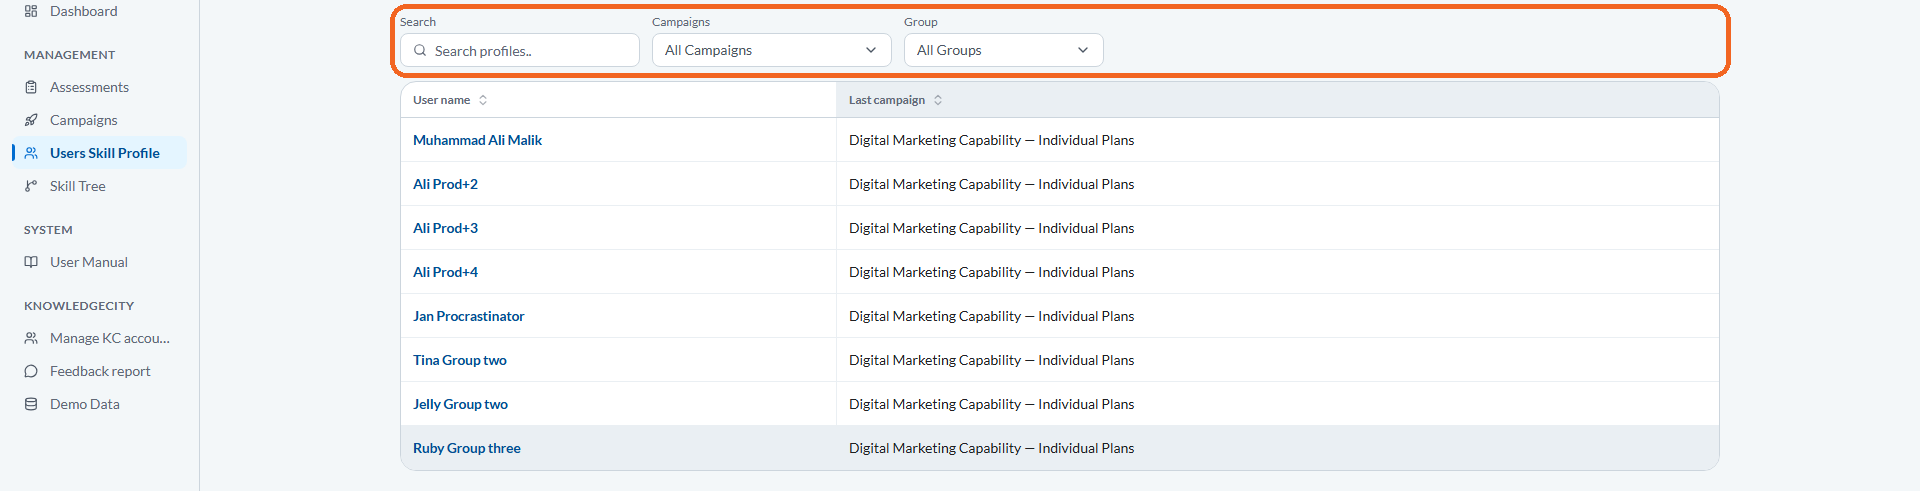
Caption: Use the filters across the top of the page to build your list:
Step 2: Read the profile list
Each learner occupies one row. The list shows the User name, the Last campaign they took part in, and their progress against the assessment Threshold and their Current level. Learners who have not yet taken a quiz appear as Never assessed.
Note: The list identifies people by name, not by email address. If two learners share a name, open the profile to confirm which record you are looking at.
Step 3: Open one learner's profile
Select a row to open that learner's detail page. The header carries their Last Assessed date and the number of Campaigns they have participated in, so you can judge how current the results are before reading them.
Step 4: Read the skill gap table
The Skill gap table lists every skill tracked for that learner, with a count of skills tracked above it. For each skill you get:
- Target: the proficiency the assessment asks for.
- Current: what the learner demonstrated.
- Status: On track, Behind target, Critical gap, or Not assessed.
Sort the table by largest gap, smallest gap, or skill name to bring the most urgent skills to the top.
Note: If a learner has taken no quiz yet, this section reads No skill data yet. Skills appear once they complete an assessment or reassessment.
Step 5: Switch between Overall and By campaign
Use Overall to see the learner's merged position across every campaign. Switch to By campaign when you need to see how they performed in one specific campaign rather than in aggregate.
Where a campaign included a reassessment, the progress bars distinguish Initial, Reassessment, and Target, so you can see whether training moved the learner closer to the goal.
Step 6: Show the assessment history
Select Show assessment history to expand the record of the learner's past assessments. This is the quickest way to check whether someone has improved over successive campaigns rather than in one measurement.
Step 7: Export the results
Select Export to Excel to download the profile as a spreadsheet for offline review or for sharing with a manager. The export reflects the filters and the view mode you currently have applied, so set those before you export.
Conclusion
Users Skill Profile turns campaign results into a per-person view: who has been assessed, which skills sit below target, and whether a reassessment moved them. Filter to the group you are responsible for, read the skill gaps, and export when you need the results outside KC Skills.